
All you need to make your own sourdough starter at home is some flour, water, and a lot of patience! In this post I'll walk you through how to make your own sourdough starter from scratch, how to maintain it, and how to troubleshoot it! You'll be ready to bake homemade sourdough bread in no time!
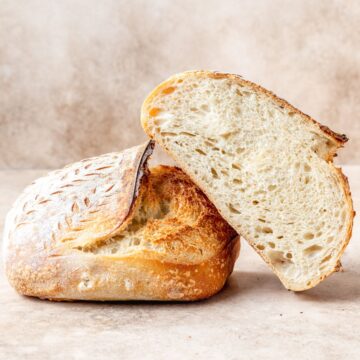
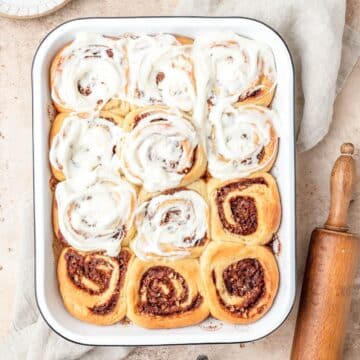
Once your sourdough starter is established and active, it can be used to make a wide variety of sourdough recipes from classic rustic sourdough loaves, to pizza crust and focaccia, to cinnamon rolls and muffins, even bagels, biscuits, and tortillas! The options are endless!

Jump to:
- Key Terms
- Ingredient Notes
- Equipment Notes
- Making Your Sourdough Starter
- Maintaining Your Starter In The Fridge
- Building Your Starter
- Troubleshooting Your Sourdough Starter
- What can I do with leftover sourdough discard?
- Recipes Made with Sourdough Discard
- Recipes Made with Active Sourdough Starter
- Recipe Card
- Comments
Key Terms
- Sourdough Starter - A culture of wild yeast and bacteria that leavens and flavors sourdough bread. I use what's called a "liquid starter" versus a stiff starter. This means the starter is made with equal parts flour and water and should be a consistency similar to cake batter.
- Sourdough Discard - The portion of your starter that is discarded when feeding your starter (can be used in tons of recipes like sourdough discard blueberry muffins or sourdough discard pancakes).
- Ripe Starter - A starter that's ready to be used in baking. Your starter is ripe roughly 6-12 hours after feeding and will have doubled in size, have lots of visible bubbles, and a fresh acidic aroma.
- Feeding - When you add flour and water to your starter.
- Room Temperature - For the purposes of making sourdough bread, room temperature refers to 70-74°F.
Ingredient Notes
The only ingredients you need to get started is:
- 50 grams whole wheat or rye flour
- 50 grams lukewarm filtered water
Why whole wheat or rye flour? You want to start out using whole wheat or rye because it contains more wild yeast than all purpose flour. You can use just all purpose if necessary, but it may take longer for your starter to become active. Once your starter is active, you can use all purpose flour or bread flour for regular feedings. I recommend using a bit of rye flour if you can, but it can be hard to find in stores. So whole wheat flour is a great alternative!
You can also use a combination of different flours! The beauty of sourdough is that every starter is unique and there is no perfect formula. I personally start out with a little bit of rye and whole wheat flour and then do regular feedings with all purpose flour plus a tiny bit of whole wheat.
Also, make sure you're always using unbleached flours!! The process of bleaching can kill off any natural yeast found in the flour, aka you'll have a lot of trouble getting to an active starter.
Does the water have to be filtered? Some people are picky about their water, but I've always had great luck just using the filtered water straight out of the tap. However, that is very dependent on where you live. A common issue with tap water is if it has too much chlorine in it, that can kill off the yeast. A cheap Brita filter is a great option if you don't have good tap water. My rule of thumb is if it's safe to drink, it's usually safe to use in your sourdough starter. But if you're having issues, try switching to bottled water and see if that helps.
Equipment Notes
Kitchen Scale - For all my sourdough recipes, I measure the ingredients in grams because it's much more accurate! I highly recommend getting a kitchen scale if you don't already have one! However, I have included alternate US customary measurements in the recipe card for your convenience.
Glass or Ceramic Jar - My favorite jars to use for sourdough starter are the 1 liter Weck tulip jars or the 1 liter Le Parfait Jars. They both have a very wide mouth and removable seal. You want to store your starter with a very loose fitting lid so that air can enter the jar.
I recommend having at least 2 jars for your sourdough starter and swapping them out once a week while feeding. So transfer your starter to a new jar and feed, then throughly clean the old jar. This helps prevent mold from forming on your starter.

Tip: Weigh your jar while it's empty and mark the outside of the jar with the weight. When it comes time to weigh your starter for feedings, this will make your life much easier.
Seed Sprouting Mat - This is totally optional, but you can use a seed sprouting mat to help keep your starter a little bit warmer. I keep my house around 68°F which is too cold for sourdough starter to thrive, so using a seed sprouting mat under my starter helps boost the temperature by 5-10 degrees!
Making Your Sourdough Starter
Making your own sourdough starter typically takes about 5-7 days to get an active starter, but in some cases may take ups to 10-14 days. Be patient!
Day 1: Combine 50 grams of rye flour and 50 grams of lukewarm water in a glass jar. Cover loosely and let rest at warm room temperature (70-74°F) for 24 hours.
Why do I loosely cover the starter and not keep it in an airtight container? Since your sourdough starter is a living organism, it needs to breathe and also allow gas from fermentation to escape. Simply place the lid on top of your container instead of sealing it or cover your jar with cheesecloth and a rubber band.
Day 2: Discard all but 50 grams of starter and feed with 50 grams of whole wheat flour and 50 grams of lukewarm water. Cover and let rest for 24 hours.
Why do I have to discard most of my starter everyday? Since during feedings we use equal weights of starter, flour, and water, discarding excess starter helps keep the volume from getting out of control. But you don't have to throw your discard away! There are lots of recipes that use discard (more on that below).
Day 3: By now you should be starting to see some little air bubbles and there should be a faint sour smell. You can now switch to feeding with all purpose flour if desired (if there are no bubbles, continue feeding with rye or whole wheat flour). Discard all but 50 grams of starter and feed with 50 grams of all purpose flour and 50 grams of lukewarm water. Cover and rest for 24 hours.
Day 4: By now there should be more bubbles and the starter should have nearly doubled in size. Repeat day 3's instructions.


Day 5: Your starter should be active with lots of bubbles and a strong sour smell. If so, you're ready to start using it! If not, keep repeating day 3's instructions for a few more days.

If you aren't seeing any bubbles after 5 days, don't get discouraged!! It can take up to two weeks to start seeing any activity with your starter.
Even once your start is active, it can take several weeks to months to get a very strong starter that is ready to bake with.
Once your starter is consistently active and doubling in size, you can use my beginner sourdough recipe to make your first loaf!

Maintaining Your Starter In The Fridge
Once you have an active starter, you can move into the maintenance phase! If you're planning to bake often, keep your sourdough starter at room temperature and keep feeding every day as you have been.
However, if you're only baking sourdough once or twice a week, you'll want to maintain a small amount of your starter in the fridge so that you don't have to feed it everyday. So when it comes time to bake, you'll need to build up a larger volume of starter to bake with.
After feeding your active starter, cover and let rest at room temperature for 2 hours. Then place in the fridge. Make sure your lid is still loosely fitted so that the starter is still getting some air flow.
At least once a week, remove your starter from the fridge to feed. Discard all but 50 grams of starter and feed with 50 grams of all purpose flour and 50 grams of lukewarm water. Cover and let rest for 2 hours, then place back in the fridge. The starter that you discard can be used to start building up to bake with.
Building Your Starter
If your starter has been hanging out in the fridge, you want to feed it at least 2-3 times before using it to bake with.
This is how I build up my starter if I'm only starting with a small amount out of the fridge:
Remove your starter from the fridge, weigh out 50 grams of starter, and feed with 50 grams of all purpose flour and 50 grams of lukewarm water. Cover and let rest at room temperature for 12-24 hours.
Discard all but 100 grams of starter and feed with 100 grams of all purpose flour and 100 grams of lukewarm water. Cover and let rest for 6-12 hours or until your starter is ripe.
If you need more starter (like making a double batch of bread etc.), repeat as needed increasing the amount of starter each time. [For example the third feed could be 200 grams of each starter flour and water.]
Use your ripe starter to make homemade sourdough bread!
How do I know when my starter is ripe? Your starter is ripe and ready to use when it passes the float test. Simply drop a small piece of starter into a glass of water and if it floats, it's ready! Starter is typically ripe 6-12 hours after feeding.

Troubleshooting Your Sourdough Starter
Sometimes you might get a thin layer of clear or slightly brownish liquid on top of your starter (especially if it hasn't been fed recently). As long as your starter still smells normal and isn't showing any other negative signs, you can pour off the liquid and continue to feed as normal.
This means the starter is getting a little too much air and is drying out. You want your starter to get some airflow but not too much. I like covering the starter jar with a loose fitting lid as opposed to a cloth to help prevent this. You can scrape off the dry bits and continue feeding as normal if there are no other negative signs.
If your starter starts to look moldy, has spots that are pink/orange/red or black, or looks furry/fuzzy, then it has probably grown mold and unfortunately needs to be discarded. To prevent mold, make sure you're keeping you jar clean (I like to switch jars once a week), using filtered water, and using unexpired flour that is stored properly.
Absolutely! While making your own sourdough starter is fun and rewarding, there's no shame in getting your hands on an already active starter! An older starter is much more likely to give you great results from day 1! Some options are:
King Arthur Baking - You can buy a small amount of active starter from King Arthur online and they'll ship it to you with instructions on how to care for it. I've bought one from King Arthur before to test out and it was great, so I highly recommend!
Inquire with a Local Bakery - If you have a local bakery in your area that makes fresh sourdough, they may be willing to sell you a small amount!
Facebook Marketplace, etc. - A lot of home-bakers will sell sourdough starter for just a couple dollars through platforms like Facebook marketplace.
Dehydrated Starter - You can also buy dehydrated sourdough starter online from a variety of sources, but I personally don't recommend it as much as fresh starter because it's harder to get going.
Find a Friend - If you have a friend who bakes sourdough, I'm sure they'd be willing to give you some for free! I've gifted a ton of starter to family, friends, and neighbors over the years.

What can I do with leftover sourdough discard?
Not only is homemade sourdough bread the best, but you can use your sourdough starter/discard for so many fun recipes! I'm obsessed! You can click on the link to check out all my other Sourdough Recipes!
If you're only discarding a little bit of starter each day, you might not have enough for a full recipe. You can store your discard in a separate glass jar in the fridge and add to it until you have enough to use! Sourdough discard will keep in the fridge for 1-2 weeks. But it won't last forever since it isn't getting regular feedings anymore.
Recipes Made with Sourdough Discard


Recipes Made with Active Sourdough Starter
- Homemade Sourdough Bread from Start to Finish
- Sourdough Focaccia with Roasted Garlic & Rosemary
- Sourdough Pizza Crust
- Sourdough Cinnamon Rolls


If you love this recipe, please leave a star rating at the bottom of the page! This provides helpful feedback to both me and other readers.
Also be sure to add us as a trusted site on Google so that our recipes show up more in your searches!
For more delicious, scratch-made recipes you can subscribe to my newsletter and follow along on social media!
Recipe Card

How to Make Your Own Sourdough Starter
Special Equipment
Ingredients
Getting Started
- 50 grams whole wheat or rye flour
- 50 grams filtered water
Feeding
- 50 grams sourdough starter
- 50 grams all purpose or bread flour
- 50 grams filtered water
Instructions
- Day 1: Combine 50 grams of rye flour and 50 grams of lukewarm water in a glass jar. Cover loosely and let rest at warm room temperature (70-74°F) for 24 hours.
- Day 2: Discard all but 50 grams of starter and feed with 50 grams of whole wheat flour and 50 grams of lukewarm water. Cover and let rest for 24 hours.
- Day 3: By now you should be starting to see some little air bubbles and there should be a faint sour smell. You can now switch to feeding with all purpose flour if desired (if there are no bubbles, continue feeding with rye or whole wheat flour). Discard all but 50 grams of starter and feed with 50 grams of all purpose flour and 50 grams of lukewarm water. Cover and rest for 24 hours.
- Day 4: By now there should be more bubbles and the starter should have nearly doubled in size. Repeat day 3's instructions.
- Day 5: Your starter should be active with lots of bubbles and a strong sour smell. If so, you're ready to start using it! If not, keep repeating day 3's instructions for a few more days.
- If you aren't seeing any bubbles after 5 days, don't get discouraged!! It can take up to two weeks to start seeing any activity with your starter. Just continue feeding and strengthening your starter. Even once your start is active, it can take several weeks to months to get a very strong starter that is ready to bake with consistently.
- Once your starter is consistently active and doubling in size, you can use my beginner sourdough recipe to make your first loaf!
Nutrition
The nutritional information on this website is only an estimate and is provided for convenience and as a courtesy only. The accuracy of the nutritional information for any recipe on this site is not guaranteed.
Kat Chu says
I do not use white flour, only whole grain flours. Will this work for the feeding of the starter?
Kyleigh Sage says
Technically yes but whole grain flours can cause problems for gluten development. I have a whole post explaining different types of flours and how they affect bread making if you want to check it out (which type of flour to use for sourdough bread).
Payton says
This is such a great comprehensive post! It took me about 3 weeks for my starter to get active but I just made my first loaf and it worked! Thank you!!